How to Storyboard an Animation in 6 Steps

An animation storyboard serves as the foundation of any animated video, film, or explainer—it visually maps out sequences, character actions, and dialogues to bring ideas to life with clarity and precision. This guide explains how to storyboard an animation in 6 actionable steps. It also introduces an AI storyboarding tool that blends manual and AI-powered workflows to streamline production.
Whether it’s 2D, 3D, motion graphics, or cut-out animation, storyboarding ensures structured storytelling, cost control, and production efficiency. In the age of automation, using a digital storyboard creator accelerates creativity while retaining full artistic control.
Get ready to go from sketch to screen with confidence.
How to Create a Storyboard in 6 Simple Steps
You’ll find countless online courses and YouTube tutorials about animation storyboarding, how to storyboard animation, and many more—but here’s the truth: mastering it doesn’t have to be complicated.
If you follow these 6 structured steps, you’ll be able to create a compelling storyboard for your animation project, even if you’re just starting an animation storyboard. This method is beginner-friendly, easy to follow, and perfect for visual thinkers.
Step 1: Understand Animation Script or Idea
Before you draw anything, dive deep into your story. Understand the plot, characters, emotional tone, and key moments. Break the script down into a sequence of visual scenes. Ask yourself:
- What is the main message?
- What emotion should each scene convey?
- What actions are essential to the storyline?
This gives you a solid base to start planning your visuals.
Step 2: Create a Shot List
A shot list is like a roadmap for an Animation storyboard. It outlines the visual plan scene by scene, including:
- Scene descriptions
- Characters involved
- Type of shot (wide, close-up, over-the-shoulder)
- Location and setting
This helps you stay organized and ensures you don’t miss any important visual beats.
Step 3: Sketch Key Scenes
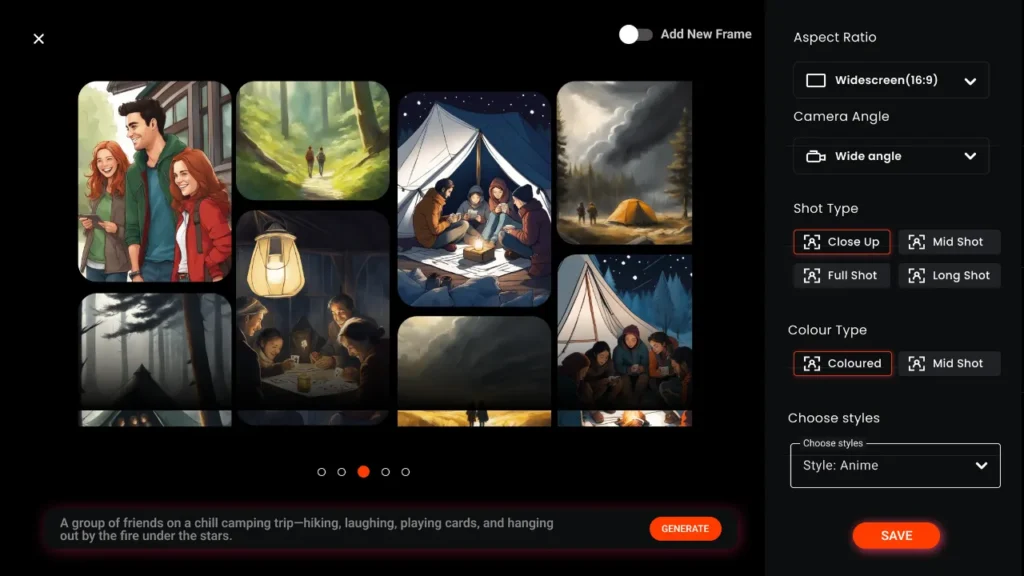
Now, start sketching! You don’t need polished art—simple stick figures or rough thumbnails are more than enough at this stage. If you don’t belong to the sketching background, you can use our AI animation storyboard that works effortlessly. Just describe the scenes and see the output in seconds. Focus on:
- Main character poses
- Scene compositions
- Movement direction
- Key actions and reactions
Just describe the arrows to show motion, and emphasize emotional expressions where needed.
Step 4: Add Dialogue and Camera Notes
Enhance each panel with dialogue, narration, or voiceover cues. This helps sync your visuals with the audio. Don’t forget to add a camera note.
- Zoom in/out
- Panning directions
- Scene transitions (cut, fade, etc.)
This guides animators, editors, and voice actors during production.
Step 5: Sequence Your Panels
Arrange your animation storyboard panels in the correct story order. Pay attention to pacing:
- Are scenes flowing logically?
- Is the timing right between fast-paced and slow moments?
- Is the buildup to key moments smooth?
At this stage, it’s okay to rearrange or remove scenes to sharpen your storytelling.
Step 6: Review and Revise
Finally, step back and review the entire animation storyboard. Ask for feedback from teammates, collaborators, or even your audience. Look for:
- Inconsistencies or missing transitions
- Weak storytelling spots
- Visual clutter or unclear direction
Make necessary adjustments until your storyboard feels smooth, logical, and emotionally impactful.
Do’s and Don’ts of Animation Storyboarding
Follow these essential guidelines to create clear, effective, and production-ready storyboards for your animation project. These tips are especially helpful for beginners looking to avoid common mistakes and improve their storytelling clarity.
| ✅ Do's | ❌ Don'ts |
| Keep your drawings simple but expressive. | Don’t clutter panels with unnecessary details. |
| Focus on the flow of the story—not perfect illustrations. | Don’t rush into drawing without understanding the script. |
| Use arrows to indicate character movement and camera directions. | Don’t ignore camera angles, scene composition, or transitions. |
| Add facial expressions and key poses to convey emotion. | Don’t leave panels too vague or emotionless. |
| Label dialogue and sound cues clearly in each panel. | Don’t forget to align visuals with audio cues like narration or effects. |
| Review your storyboard and seek feedback before finalizing. | Don’t skip the review and revision process. |
| Break your storyboard into acts or scenes for better organization. | Don’t mix too many actions or angles in a single panel. |
| Maintain consistent character design and layout throughout the storyboard. | Don’t change character proportions or scene perspective randomly. |

What Our Tool Provides — AI Powered & Traditional Storyboarding in One Place
At our platform Immersfy, we believe storytelling should be simple, powerful, and accessible—whether you’re a beginner, a professional animator, or somewhere in between. That’s why we’ve built a tool that combines the flexibility of traditional animation storyboarding with the speed and intelligence of AI-powered features.
You can sketch ideas manually or let AI help generate visuals and structure from your script. The goal is to help you focus on creativity, not complexity. You can create a project in Hours from storyboard to animation.
Start from Scratch or Use Templates
Build your storyboard panel by panel, or use pre-designed storyboard templates to speed up your workflow.
Draw or Upload Animation sketches
Prefer hands-on control? You can manually sketch each frame or upload your hand-drawn images.
Generate Storyboards with AI
Just input your script or scene description, and our AI storyboard generator will create visuals, structure, and even suggest transitions.
Voice-to-Storyboard Feature
Dictate your scenes, and let the AI convert your voice into visual panels.
Add Notes, Dialogue & Camera Directions
Easily annotate each panel with essential production details.
Flexible Editing & Reordering
Rearrange scenes anytime with drag-and-drop ease.
Create Animatics
Turn your static storyboard into a rough animated sequence with timing and sound.
Whether you want the control of traditional methods or the efficiency of AI, our tool offers both in one streamlined workspace.
Why AI Is a Game-Changer in Animation Storyboarding
AI is transforming the animation industry—especially when it comes to storyboarding. Traditional methods often require hours or even days of manual sketching, editing, and sequencing. But with the rise of AI-powered storyboard tools, the process has become faster, smarter, and more accessible than ever before.
By automating time-consuming tasks and simplifying scene creation, AI animation storyboard tools allow creators to focus on storytelling rather than technical execution. Whether you’re a beginner or a professional animator, AI can drastically improve your creative workflow.
Key Advantages of Using AI in Animation Storyboarding:
- Speeds Up Storyboarding: Generate scene visuals, transitions, and camera movements in just minutes.
- Simplifies Creative Ideation: Input your script or scene description and let AI bring it to life visually.
- Empowers Non-Artists: No drawing skills? No problem—AI makes animation storyboard creation easy for everyone.
- Enhances Team Collaboration: Share editable storyboards with teams, clients, or producers for instant feedback.
- Smart Learning Capabilities: The more you use it, the more accurate and tailored the results become.
- Ideal for Fast-Paced Projects: Perfect for content creators, ad agencies, educators, and studios needing quick turnarounds.
This evolution makes the transition from storyboard to animation more seamless than ever before.

Types of Animation & the Artists Who Bring Them to Life
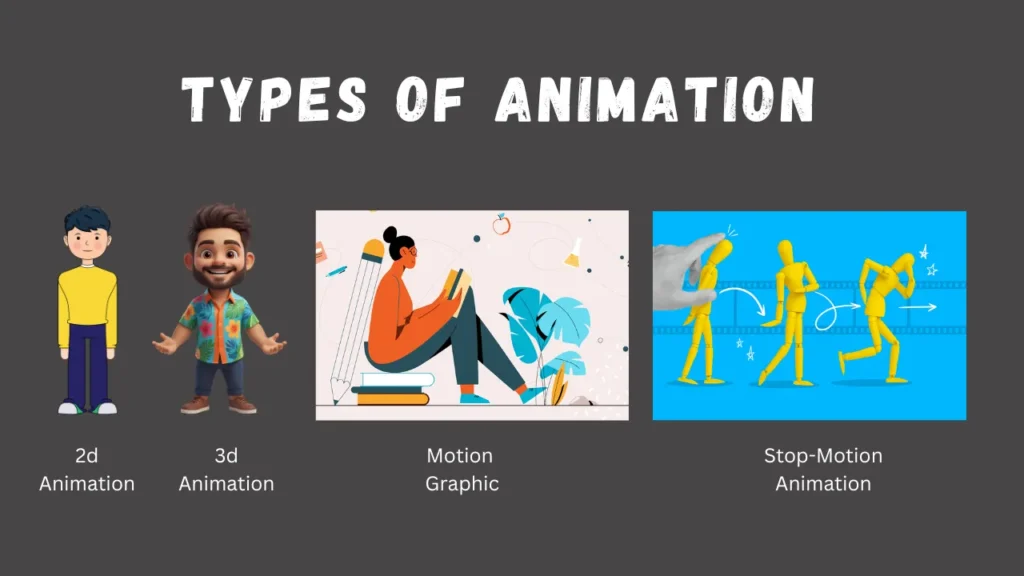
Animation is a blend of visual storytelling, technical precision, and artistic creativity. Whether you’re developing an animated film, series, or explainer video, it’s essential to understand the different types of animation styles—and the professionals who make them possible.
Below, we break down the most popular animation techniques and the key animation artist roles involved in each process.
2D Animation
Traditional flat animation is created frame by frame, either hand-drawn or digitally. Commonly used in cartoons, marketing videos, and mobile games.
Storyboard Roles for This Style
- 2D Animator—Draws and animates characters and scenes in 2D space.
- Storyboard Artist—Visualizes scenes and action before animation begins.
- Character Animator—Focuses on expressive movement and timing.
3D Animation
Animation created in three-dimensional space using digital models. Used in films, games, and VR content.
Storyboard Roles for This Style
- 3D Animator—Brings digital models to life with realistic movement.
- Rigging Artist—Builds the digital skeleton that allows models to move.
- Technical Animator—Ensures animations run smoothly with correct physics.
Stop-Motion Animation
Frame-by-frame photography of physical objects or puppets. Used in claymation, product videos, and indie films.
Storyboard Roles for This Style
- Stop Motion Animator—Moves and photographs real-world objects.
- Set Designer/Model Maker—Crafts props and environments.
Motion Graphics
Graphic design in motion—often used in intros, infographics, and social media content.
Storyboard Roles for This Style
- Motion Graphics Designer—Animates text, shapes, and logos.
- FX Animator—Adds dynamic effects like transitions and particles.
Cut-Out Animation
Flat characters and props are cut from paper or digitally simulated, then animated. Common in kids’ shows and experimental art.
Storyboard Roles for This Style
- 2D Animator—Manipulates character parts and layers.
- Storyboard Artist—Plans how each piece will move from scene to scene.
Whiteboard Animation
Illustrations appear as if drawn in real-time—great for educational and explainer content.
Storyboard Roles for This Style
- Illustrator/Animator—Syncs illustrations with narration and timing.
- Motion Graphics Artist—Polishes flow and effects.
Experimental Animation
Non-traditional styles that break animation rules for artistic or abstract effect. Often used in indie films, music videos, or festivals.
Storyboard Roles for This Style
- Multidisciplinary Animator—Combines styles, media, or unconventional tools.
- Creative Director—Oversees vision, tone, and narrative cohesion.
FAQs: How to Storyboard an Animation
What is the best way to storyboard an animation project?
The best way to storyboard an animation is by breaking down your script into scenes, sketching key visuals, and using a storyboarding tool to organize them. An AI animation storyboard tool speeds up this process, making it easier to go from storyboard to animation efficiently.
Can AI animation tools be used to storyboard animated content?
Yes, AI tools are widely used to create animation storyboards. They allow creators to input a script or concept and quickly generate visual panels, scene directions, and transitions. This is especially helpful for non-artists or teams looking to speed up the planning phase.
Why is it important to storyboard before animating?
Knowing how to storyboard an animation helps save time, ensures clear storytelling, and avoids production errors. An AI animation storyboard tool simplifies this even more.
What are some tools used to storyboard an animation?
For a more advanced and efficient approach, Immersfy stands out as an AI-powered platform that auto-generates storyboard panels from scripts, voice input, or scene Descriptions making it ideal for creators who want to move quickly from concept to production without compromising on structure or quality.
How can beginners learn how to make a storyboard for animation?
Beginners can start by using a storyboard template, sketching simple scenes, and adding notes. Learning how to make a storyboard for animation becomes easier with an AI animation storyboard tool that generates panels automatically.
What are the steps from storyboard to animation?
Steps include script breakdown, visual planning, and panel creation. Then comes animation. With a good storyboard, moving from storyboard to animation becomes smooth. Using an AI animation storyboard tool helps automate much of this workflow.
How does an AI animation storyboard tool help in production?
An AI animation storyboard tool simplifies the pre-production process by generating scene visuals from scripts, descriptions, or even voice inputs. It saves time on manual sketching, helps with layout planning, and ensures faster feedback and revisions—making it ideal for fast-paced projects or teams with limited resources..
Is there a difference between traditional and AI-assisted storyboarding?
Yes. Traditional storyboarding involves manual sketching and scene planning, offering full creative control but requiring more time and skill. AI-assisted storyboarding automates parts of the process, making it faster and more accessible—ideal for quick iterations or early-stage concept development.
